# Email Templates
> Learn how to create and manage reusable email templates for your broadcasts, sequences, transactional emails, and double opt-in confirmation emails.
Source: https://sendbroadcast.net/docs/templates
Templates are reusable email designs that save you time when creating broadcasts, sequences, and automated emails. Instead of writing the same content repeatedly, create a template once and use it across your email marketing.

## How Templates Work
Templates store your email content including:
- **Label** - An internal name to identify the template
- **Subject line** - The email subject recipients see
- **Preview text** - Text shown after the subject in inbox previews
- **Body content** - The email content itself
- **Tags** - Internal labels for grouping related templates
When you create a broadcast or sequence step, you can start from a template. The template's content is copied to your new email, which you can then customize as needed.
## Creating a Template
To create a template:
1. Navigate to **Templates** in the sidebar
2. Click **New Template**
3. Choose your editor type: Rich Text, HTML or Drag and Drop

### Editor Types
**Rich Text** (Recommended for most users)
- Simple visual editor with formatting toolbar
- Bold, italic, underline, and strikethrough text
- Links and images, uploaded or picked from [File Assets](https://sendbroadcast.net/docs/file-assets)
- Lists (bulleted and numbered)
- Text alignment options
**HTML** (Advanced users)
- Full HTML code editor
- Complete control over email design
- Syntax highlighting
- Best for custom branded designs
**Drag and Drop**
- Build the email from pre-built blocks
- Design visually, with no code
- See [Drag-and-Drop Email Builder](https://sendbroadcast.net/docs/block-email-builder)

### Template Fields
| Field | Required | Description |
|-------|----------|-------------|
| Label | Yes | Internal name to identify this template |
| Subject | Yes | Email subject line recipients see |
| Preview Text | No | Text shown after subject in inbox previews |
| Body | Yes | The email content |
| Tags | No | Internal labels for grouping related templates |
## Viewing a Template
Click any template to view its details and preview how it will appear in recipients' inboxes.

The template detail page shows:
- **Email preview** - See how your email looks on desktop and mobile
- **Quick Actions** - Create a broadcast directly from this template
- **Details** - Creation and update timestamps
- **API Usage** - Endpoint and example code for API access
(Requires Broadcast 2.52 or later)
The preview fills in the template's Liquid with mock data and has the **Preview data** panel, in the desktop and the mobile view, so you can switch each condition and see each version of the email. See [Broadcast Emails](https://sendbroadcast.net/docs/broadcast-emails) ("Previewing Personalized Content"). Confirmation templates have the same panel, and `{{ confirmation_url }}` renders as a placeholder link. An opt-in form or the API decides whether a confirmation email has its unsubscribe link, so a confirmation template that uses `{{ unsubscribe_url }}` gets an `unsubscribe_url` checkbox in the panel. It starts on; clear it to see the email without the link.
## Using Templates
### In Broadcasts
From the template detail page, click **Create Broadcast** to start a new broadcast pre-filled with the template's content. You can also select a template when creating a new broadcast.
### In Sequences
When adding an email step to a sequence, you can select a template to use as the starting content.
### In Opt-In Forms
Templates can be used for:
- **Confirmation emails** - Sent when subscribers confirm their subscription
- **Welcome emails** - Sent after subscribers are confirmed
## Personalization
Templates support Liquid variables for personalization:
```liquid
Hi {{ subscriber.first_name | default: "there" }},
Thanks for subscribing to our newsletter!
```
### Standard Variables
- `{{ subscriber.email }}` - Subscriber's email address
- `{{ subscriber.first_name }}` - First name
- `{{ subscriber.last_name }}` - Last name
- `{{ unsubscribe_url }}` - Unsubscribe link
### Custom Data Variables
If your subscribers have custom data stored as JSON (e.g. via the API), you can access those fields in templates using any of these equivalent syntax patterns:
```liquid
{{ subscriber.data.my_field }}
{{ subscriber.custom_data.my_field }}
{{ data.my_field }}
{{ custom_data.my_field }}
```
All four forms are interchangeable. Use whichever reads most naturally in your template.
For example, if a subscriber has the custom data `{"unsubscribe_token": "abc123"}`, you could write:
```liquid
Unsubscribe
```
## Confirmation Templates
Confirmation templates are a special type of template used for double opt-in subscriber confirmation emails. They have their own dedicated section in the sidebar under **Templates > Confirmation**.
Every channel automatically gets a default confirmation template when created. You can customize it or create additional confirmation templates for different use cases.
(Requires Broadcast 2.49 or later)
Channels that existed before Broadcast 2.49 get one too when you upgrade, if they had no default. It is named **Default confirmation email** and is written in the channel's language.
### Accessing Confirmation Templates
Navigate to **Templates** in the sidebar, then click **Confirmation** in the navigation menu.
### Creating a Confirmation Template
1. While on the confirmation templates page, click **New Template** in the sidebar
2. Check the **Create as confirmation template** checkbox in the format chooser
3. Choose Rich Text or HTML editor
4. Fill in the template fields
### Confirmation Template Fields
| Field | Required | Description |
|-------|----------|-------------|
| Label | Yes | Internal name to identify this template |
| Subject | Yes | Email subject line for the confirmation email |
| Body | Yes | Email content: use `{{ confirmation_url }}` for the confirm link |
| Confirmation Page Text (per-state) | No | Heading, body and an optional button for each of the six page states subscribers might see (Confirmed, Already Confirmed, Link Expired, Link Not Found, Confirmation Failed, Generic Error). Edited in each of the channel's languages with **Edit Page**, which opens the full-screen page editor. See [Confirmation Pages](https://sendbroadcast.net/docs/confirmation-pages). |
| Confirmation Text (legacy) | No | Single-paragraph message shown on the success state. Superseded by the per-state editor above; retained for backward compatibility. |
| Default | No | Whether this is the channel's default confirmation template |
### Available Variables
Use these Liquid variables in your confirmation template's subject and body:
- `{{ confirmation_url }}` - The link subscribers click to confirm. It is a plain URL: put it in a link or button (`[Confirm]({{ confirmation_url }})`) rather than on its own, or it shows as bare text
- `{{ channel_name }}` - Your channel's name
- `{{ email }}` - Subscriber's email address
- `{{ first_name }}` - Subscriber's first name
- `{{ last_name }}` - Subscriber's last name
- `{{ name }}` - Subscriber's full name
- `{{ unsubscribe_url }}` - Unsubscribe link
### Default Confirmation Template
Each channel can have one default confirmation template. This template is used when subscribers are created via the [Subscribers API](https://sendbroadcast.net/docs/api-subscribers) with `double_opt_in: true` and no specific template is specified.
(Requires Broadcast 2.49 or later)
Opt-in forms without their own confirmation template use it too. The app does not let you delete the default. If it is deleted or unset through the API, Broadcast creates it again the next time it needs to send a confirmation email.
Toggle the default switch on the confirmation templates index page, or tick **Default confirmation template** in the template's edit screen, to change which template is the default. The checkbox asks you to confirm first. Setting a new default automatically unsets the previous one.
### Confirmation Page Text
The confirmation template controls the page subscribers see after clicking the confirmation link. On the template's edit screen, the **Confirmation page** card under the email previews it, and **Edit Page** opens the full-screen page editor in a new tab. There you can write the heading and body for any of the six page states (Confirmed, Already Confirmed, Link Expired, Link Not Found, Confirmation Failed, Generic Error) in each of the channel's languages, add a button that sends subscribers on (for example back to your website), and set the page's colours.
The page editor previews every state as you type. You can also open the Confirmed state from the template's detail page with **Preview confirmation page**.
For full details, including how the page is reached from each subscriber-creation flow, redirect-URL behavior, and the resolution chain, see [Confirmation Pages](https://sendbroadcast.net/docs/confirmation-pages).
## Managing Templates
### Organising Templates with Tags
Tags group related templates so a large library stays navigable. Add them in the **Tags** field when creating or editing a template: type a tag and press Enter, and repeat for as many as you need.
Tags are internal. Recipients never see them.
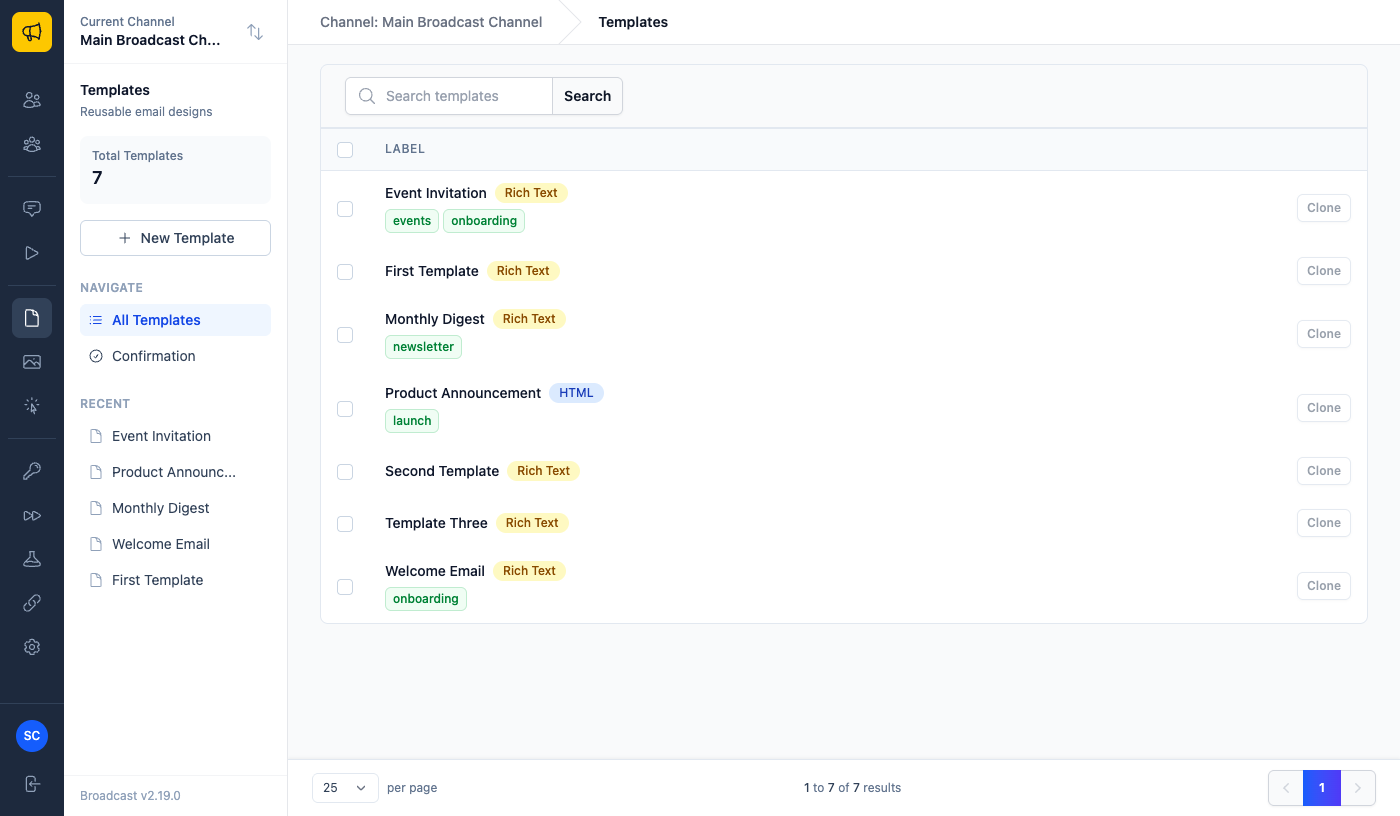
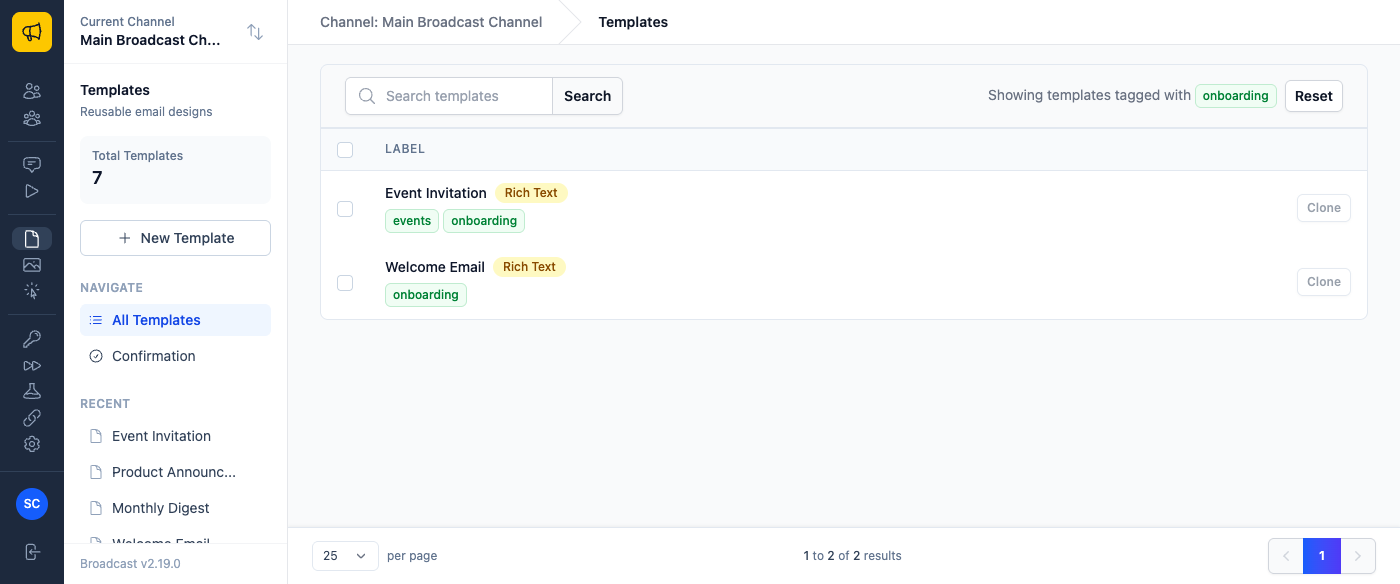
Tags appear beneath each template name on the list. Click one to show only the templates carrying that tag, and **Reset** to clear the filter.
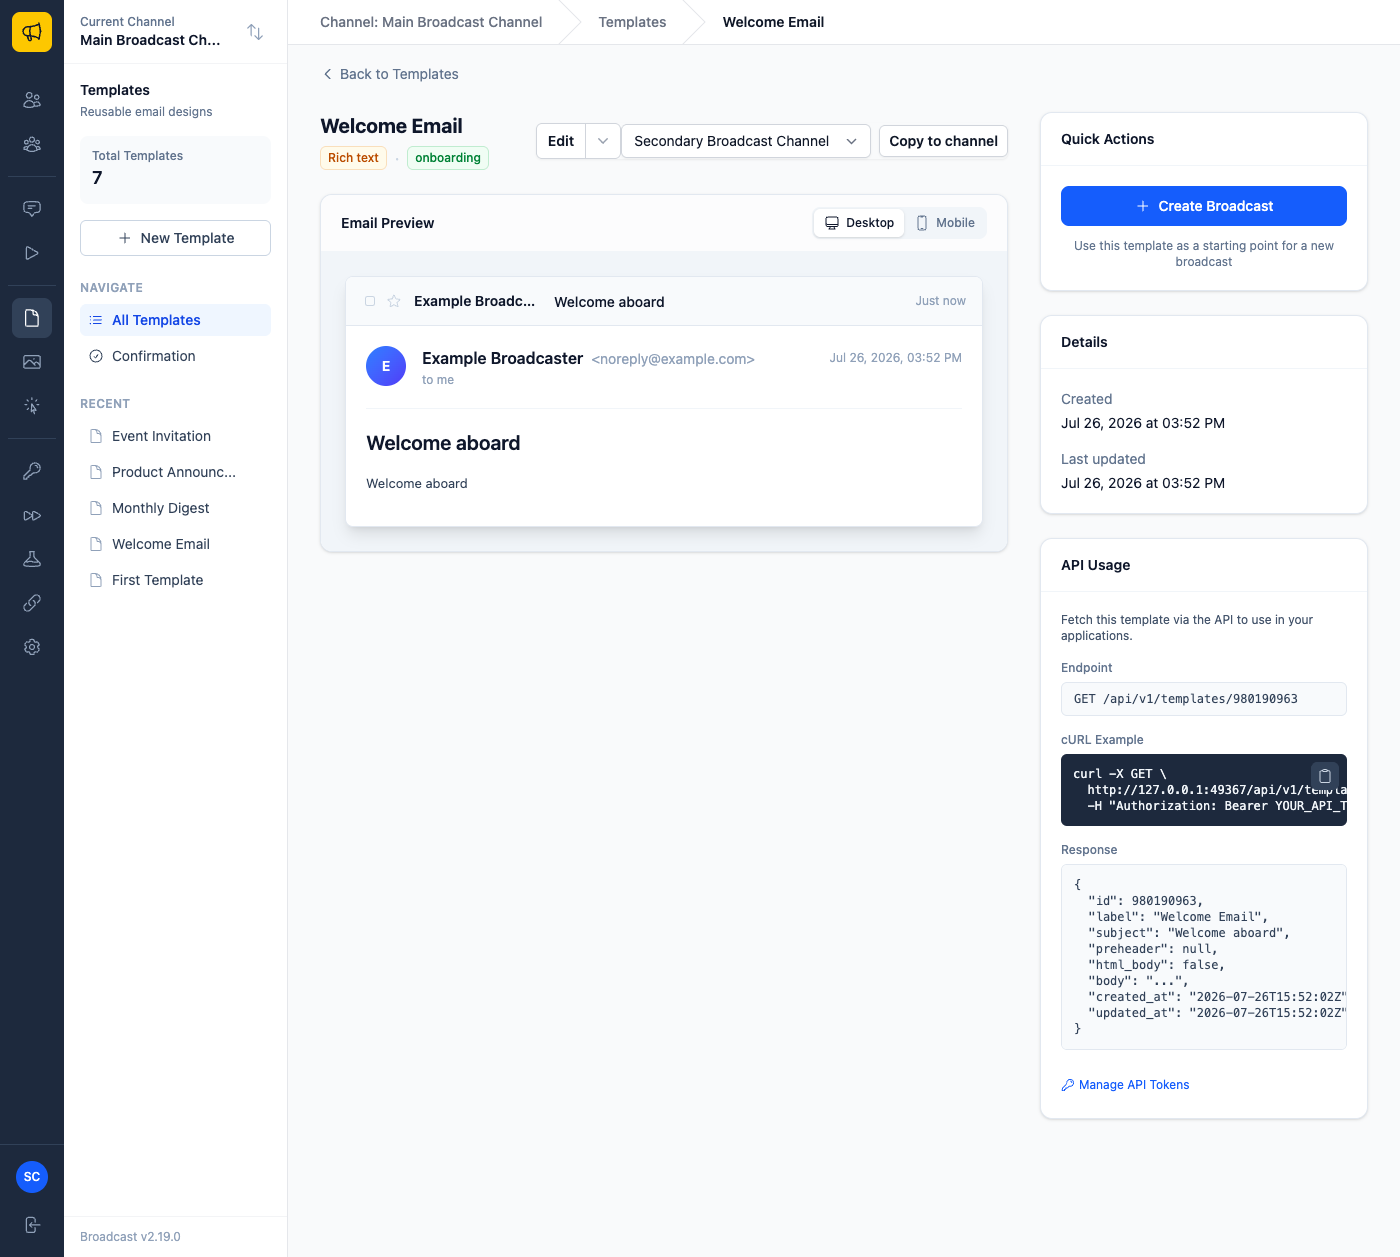
A template's own page shows its tags next to the editor type, and those are clickable too: a quick way to jump from one template to everything related to it.
Useful groupings include the campaign a template belongs to (`onboarding`, `black-friday`), its role (`transactional`, `newsletter`), or its state (`needs-review`). Tags travel with a template when you clone it or copy it to another channel.
### Copying a Template to Another Channel
If you run several channels, a template built in one can be copied into another instead of pasting HTML by hand.
On the template's page, pick the destination channel and click **Copy to channel**.
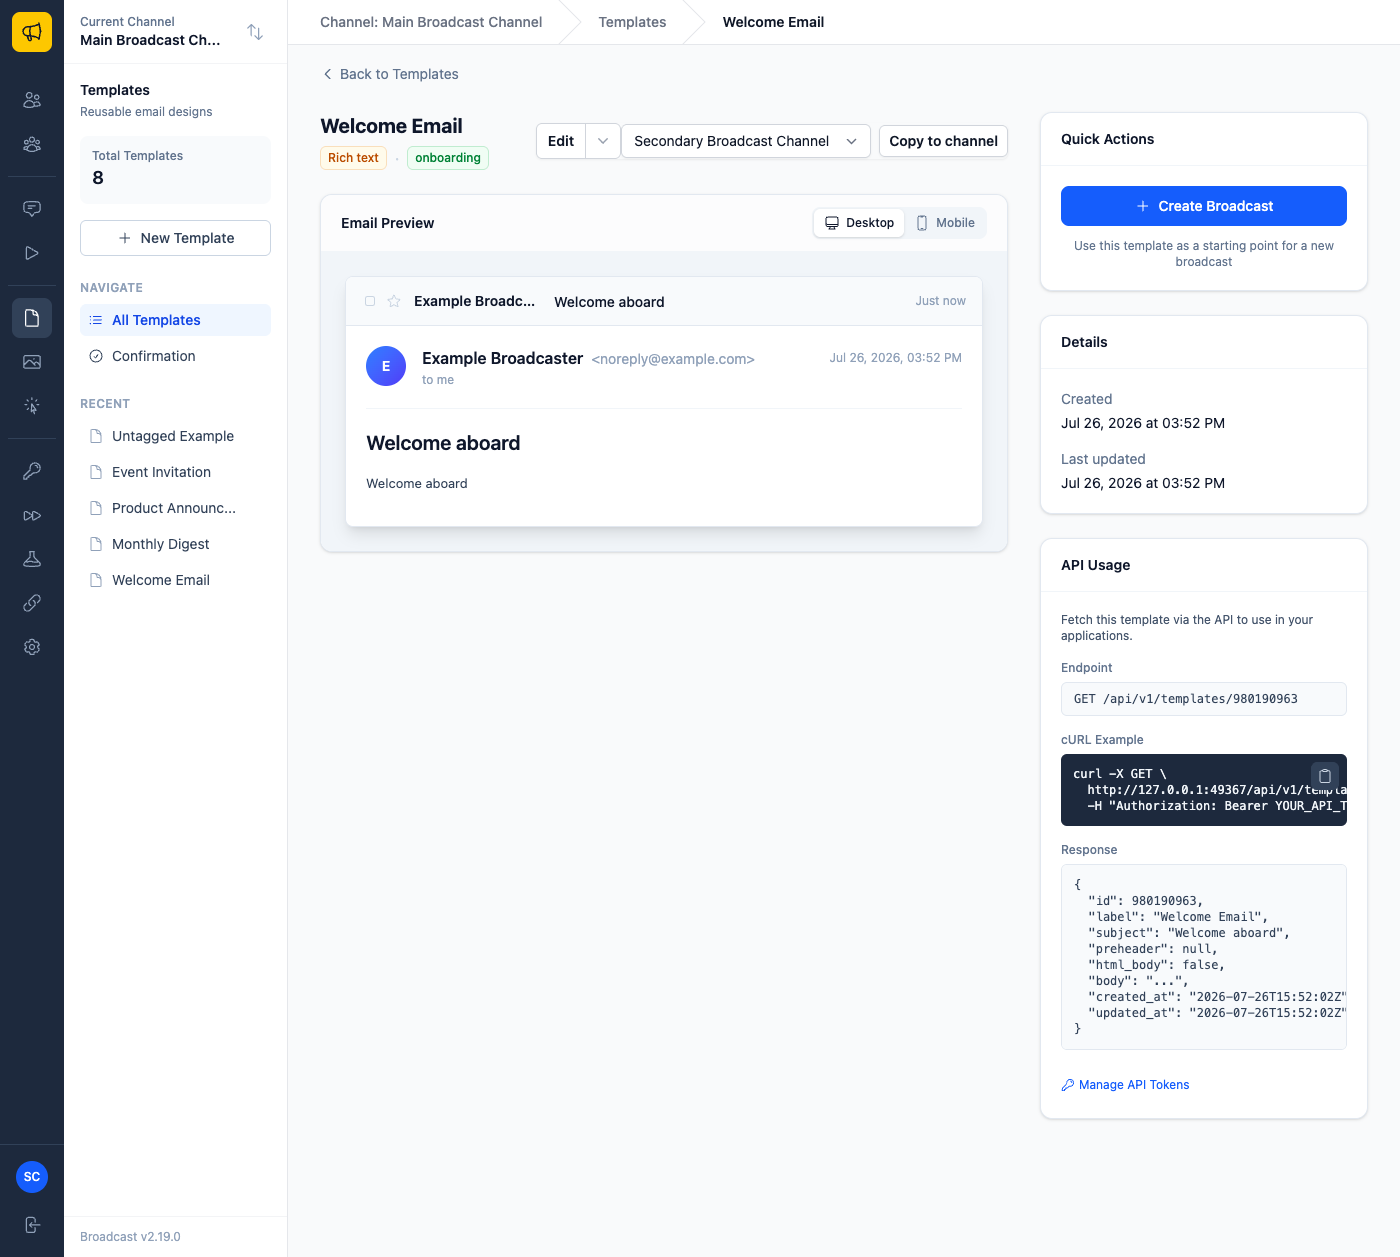
The copy is independent of the original: editing either leaves the other untouched. Subject, preview text, body, editor type and tags all come across.
The confirmation message includes a **View in ** link, which switches you to the destination channel and opens the copy in one step.
A few things worth knowing:
- Only channels you have access to appear in the list.
- If the destination already has a template with the same name, the copy is named ` (Copy)` so nothing is overwritten. - Images keep working. Uploaded files are shared across channels rather than owned by one, so pictures embedded in the body still display in the destination channel. - The copy never inherits the **default confirmation template** flag, since each channel has its own default. ### Duplicating Templates Click **Clone** on any row of the Templates list to make a copy. This is the fastest way to build a family of related emails: design one, clone it, and change only what differs. The Clone action is always available; it simply brightens when you hover the row, so a long list stays easy to scan. 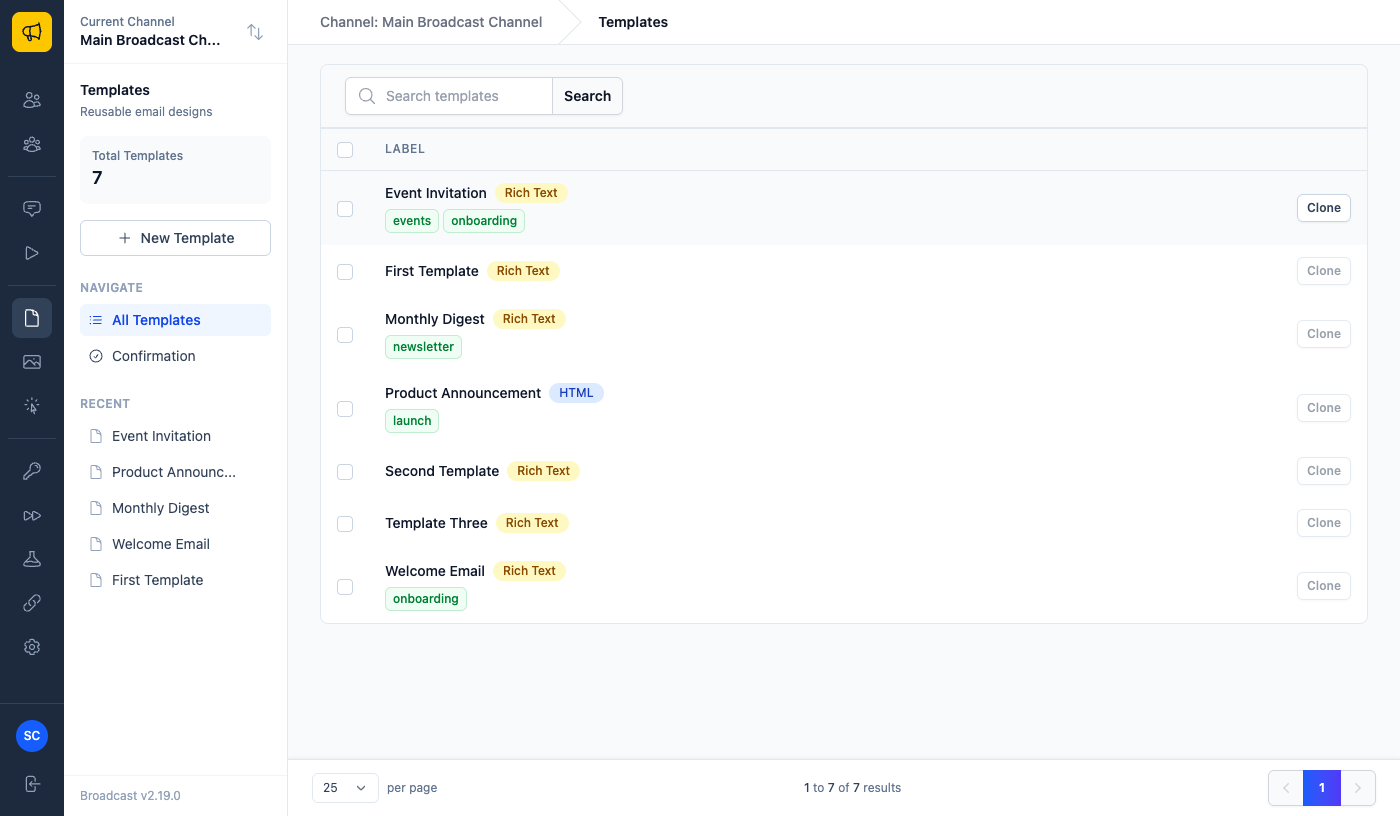 The copy is named `Copy of ` and includes the subject, preview text, body content, and editor type of the original. Cloning the same template more than once adds a number to keep labels unique (`Copy of Welcome Email (2)`). The copy is a completely independent template: editing it never affects the original, and it starts out unused by any sequence or opt-in form. **Note:** Cloning requires the *Duplicate templates* permission on the channel. If the Clone button is not visible, ask an administrator to grant it under Users → Permissions. ### Editing Templates Click **Edit** on any template to modify its content. Changes to templates do not affect emails that were already created from them. **Note:** If a template is used by sequences or opt-in forms, editing it will affect future emails sent by those features. ### Deleting Templates Templates can be deleted from the template detail page using the dropdown menu. However, you cannot delete a template that is: - Used by sequence steps - Used by opt-in forms (as confirmation or welcome email) Remove the template from those features first before deleting. ### Bulk Operations Select multiple templates using the checkboxes to perform bulk delete operations. ## API Access Templates are accessible via the REST API. From any template's detail page, you'll find: - The API endpoint for that template - A cURL example - The expected response format See [API Templates](https://sendbroadcast.net/docs/api-templates) for full API documentation. ## Best Practices 1. **Use descriptive labels** - Make it easy to find the right template later 2. **Include preview text** - Improves open rates by giving more context in inboxes 3. **Test personalization** - Send test emails to verify Liquid variables render correctly 4. **Keep templates focused** - Create separate templates for different purposes rather than one generic template 5. **Review before using** - Always preview templates before creating broadcasts