Confirmation Pages
The confirmation page is the page a subscriber lands on after they click the link in a double opt-in confirmation email. By default, Broadcast renders a generic English page with a green checkmark and a short success message. You can customize the headings and body text for every page state, redirect subscribers to your own thank-you page, or change the page’s language.
The Six Page States
A subscriber may land on the confirmation page in any of these states:
| State | When it renders |
|---|---|
| Confirmed | The subscriber clicked a valid, unexpired link for the first time. |
| Already Confirmed | The subscriber clicks the same link a second time after already confirming. |
| Link Expired | The subscriber clicked the link more than 24 hours after it was sent. |
| Link Not Found | The token in the URL is invalid or has already been deleted. |
| Confirmation Failed | A server error prevented the confirmation from being recorded. |
| Generic Error | A fallback for any other unexpected condition. |
Each state has its own heading and body text. You can override either or both for any state.
How Subscribers Reach the Page
Confirmation links can reach a subscriber’s inbox through four different flows. Each flow stores the SubscriberConfirmation record differently, but they all funnel through the same confirmation page.
- Opt-in form with double opt-in enabled — A visitor submits one of your opt-in forms. Broadcast sends a confirmation email and the link points at the confirmation page.
- Subscribers API with
double_opt_in: true— Your code creates a subscriber programmatically and Broadcast handles the confirmation email. - Transactionals API with
double_opt_in: true— You send your own custom transactional that includes{{ confirmation_url }}in the body. - Manual transactional with
{{ confirmation_url }}— You hand-author any transactional email and include the{{ confirmation_url }}Liquid variable; Broadcast injects the URL of the most recent pending confirmation for that subscriber.
The first three create a SubscriberConfirmation record. The fourth reuses whichever pending confirmation already exists.
Where to Configure the Page Text
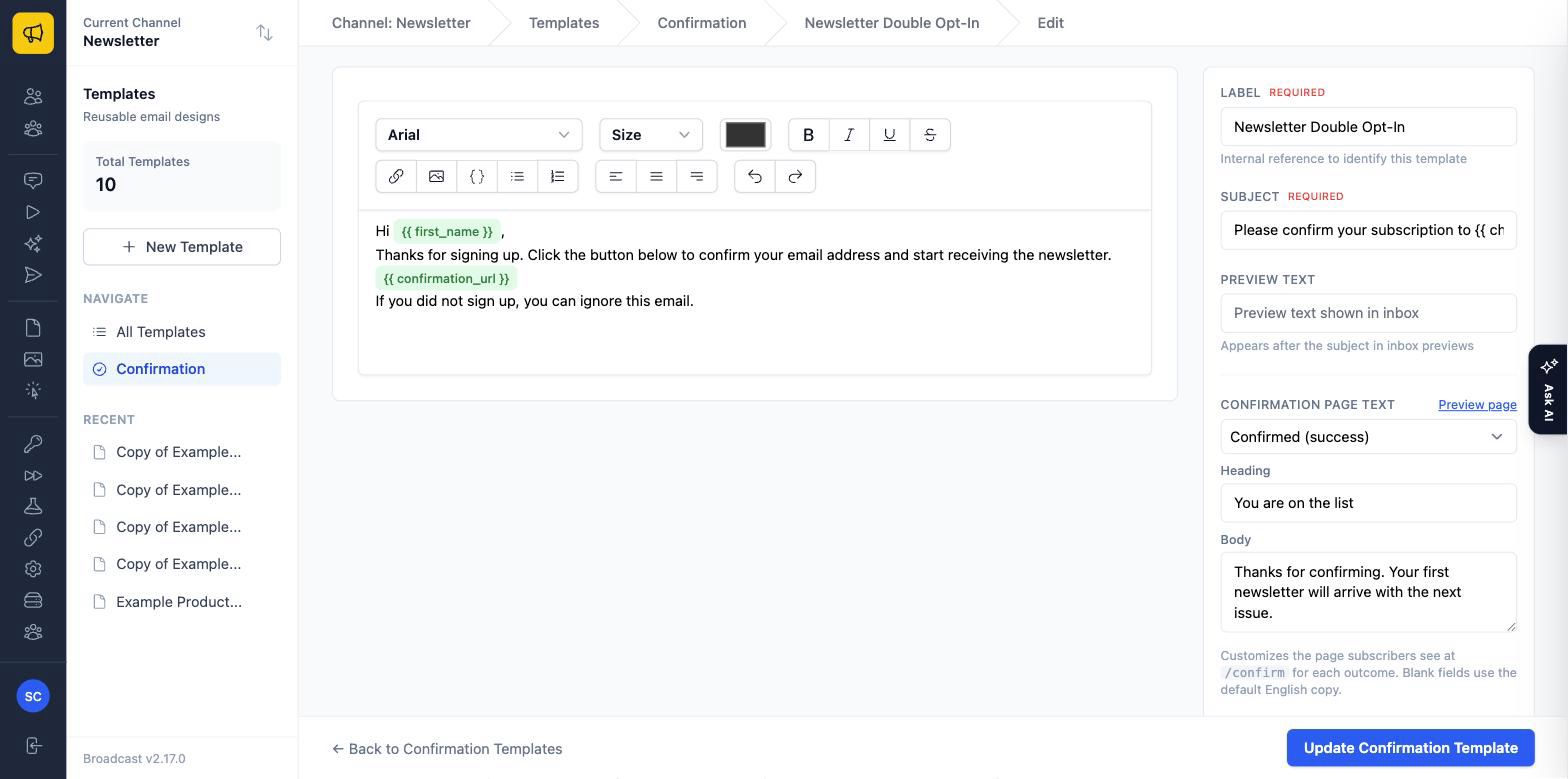
The page text lives on a confirmation template — the same template that defines the confirmation email. To edit it:
- Go to Templates → Confirmation.
- Open the template that’s used for your flow.
- In the right sidebar, find Confirmation Page Text.
- Use the state selector dropdown to switch between the six page states.
- Fill in Heading and/or Body for any state you want to customize. Blank fields fall back to the defaults.
Which template you should edit depends on which flow your subscribers go through:
| Your flow | Which template drives the page |
|---|---|
| Opt-in form (double opt-in) with a confirmation email template selected on the form | The template selected on that form |
| Opt-in form (double opt-in) with no template selected on the form | The channel’s default confirmation template (or English defaults if no default exists) |
Subscribers API with confirmation_template_id |
The supplied template |
Subscribers API without confirmation_template_id |
The channel’s default confirmation template (the API returns a 422 error if no default exists) |
Transactionals API with confirmation_template_id |
The supplied template |
Transactionals API without confirmation_template_id |
The channel’s default confirmation template (or English defaults if no default exists) |
Manual transactional with {{ confirmation_url }} |
The template attached to whichever pending confirmation the recipient already has — typically inherited from one of the flows above |
To mark a template as the channel default, open it on the Templates → Confirmation index page and toggle the Default switch. See Email Templates for details.
How Page Text Resolves
When a subscriber loads the page, Broadcast resolves each piece of text in this order:
- Per-state setting on the template (
HeadingandBodyfields in the new editor) — applies to any state and either field. - Legacy
Confirmation Textfield on the template — applies only to the body of the Confirmed state. Pre-existing data set in older versions of Broadcast continues to render here for backward compatibility. - Channel’s default English copy — applies when no template-level override is set.
Headings always either come from a per-state override or the default — there is no legacy heading field. Bodies for non-Confirmed states only come from a per-state override or the default — the legacy field never fills them in.
If you set a per-state body and a legacy Confirmation Text on the same template, the per-state body wins.
Redirect After Confirmation
Instead of showing Broadcast’s confirmation page, you can redirect subscribers to your own URL — useful if you have a branded thank-you page on your site.
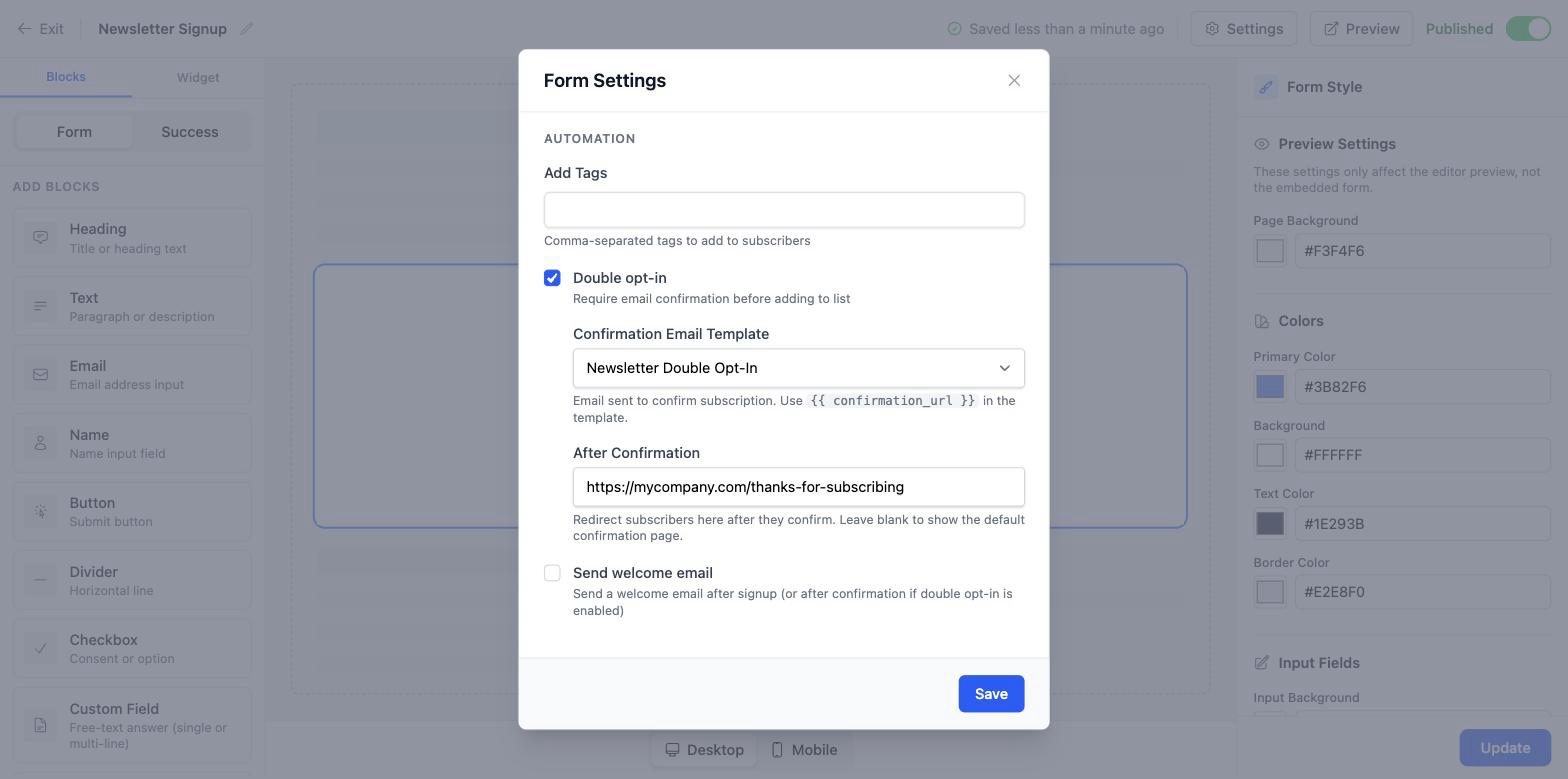
- Go to Opt-in Forms and edit a form.
- Click the Settings (gear) button.
- Enable Double opt-in if it isn’t already.
- Fill in the After Confirmation URL field with an
http://orhttps://URL. - Save.
Subscribers who confirm via this form will be redirected to that URL instead of seeing Broadcast’s confirmation page.
Important details:
- Only the opt-in-form flow supports redirects. Confirmations created via the Subscribers API, Transactionals API, or manual
{{ confirmation_url }}use the rendered page; there’s no per-record redirect setting on those flows. - The redirect runs only on the Confirmed and Already Confirmed states. If a subscriber clicks an expired or invalid link, they see Broadcast’s standard error page — they are not redirected.
- The confirmation runs first. Subscribers are marked confirmed (and any tags, sequences, and welcome emails fire) before the browser navigates to your URL.
- Validation rejects unsafe schemes.
javascript:,data:, and other non-HTTP schemes are blocked at save time.
Page Language
Each channel has a Language setting that controls the page’s default copy. Find it under Settings → General Channel Settings → Confirmation Page.
In Phase 1 of this feature, only English defaults ship with Broadcast. The picker is in place so future releases can add additional languages. If your customer base is non-English today, customize the per-state heading and body fields on your confirmation templates rather than waiting for translations.
Previewing the Page
You can preview each state without sending a real confirmation email:
- From the template editor sidebar, the Preview page link opens the current state in a new tab. Switching the state selector dropdown updates which state opens.
- From the template show page, the Preview confirmation page button opens the success state.
- You can manually pass
?state=<state>in the URL — e.g.,/templates/confirmation/<id>/preview_page?state=expired— to preview any state.
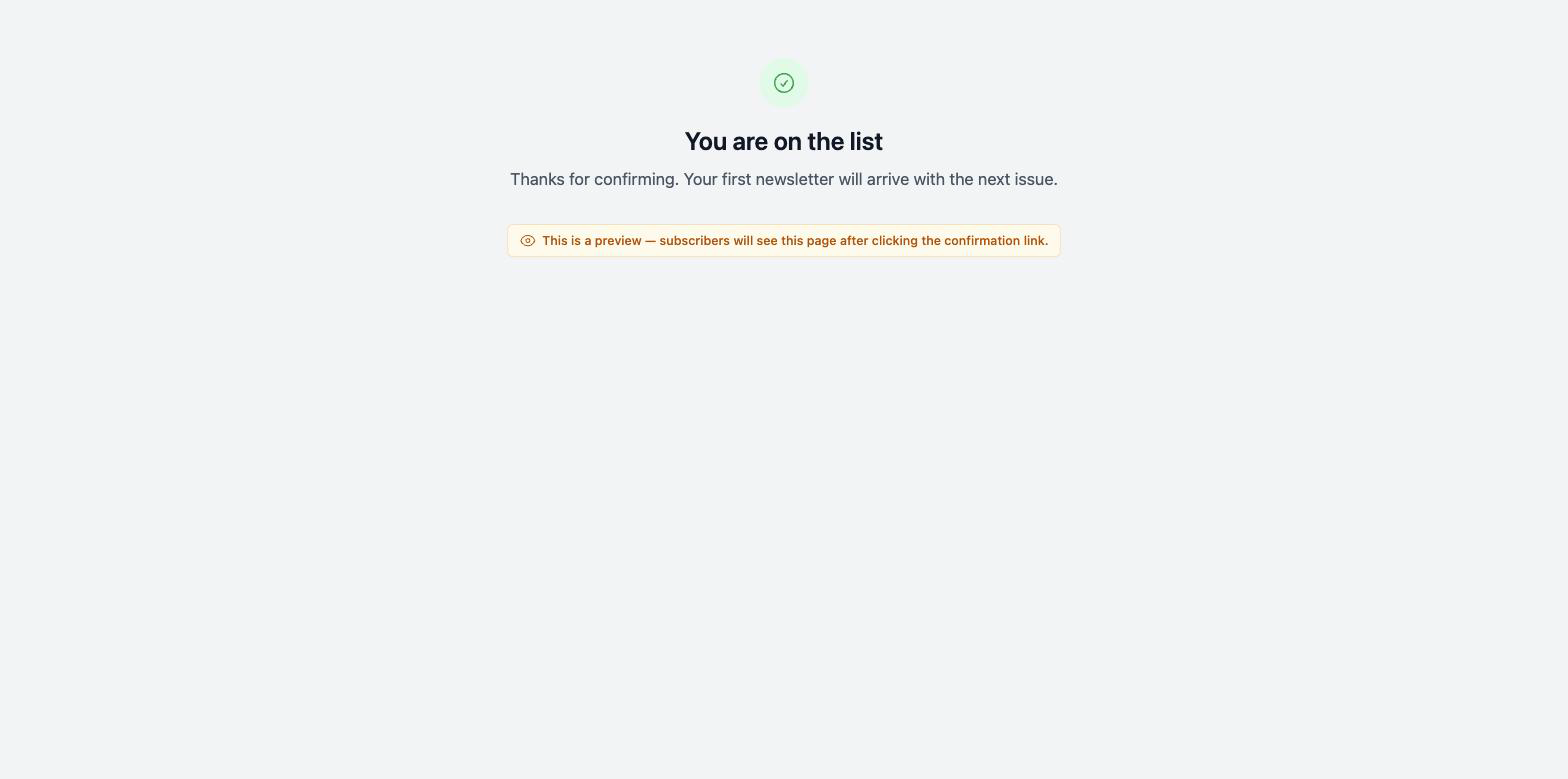
A small banner on the previewed page reads “This is a preview — subscribers will see this page after clicking the confirmation link” so it’s clear you’re not viewing a real submission.
Frequently Asked Questions
My subscribers see “Thank you for confirming your email address.” How do I change that?
Open the confirmation template that drives your flow (see the configuration table above). In the sidebar, set the Confirmed → Body field to your custom text and save.
I want subscribers to land on my own site instead of Broadcast’s page.
If subscribers come from an opt-in form, set After Confirmation on that form (see Redirect After Confirmation). For other flows, you’ll need to render your own page based on the URL the subscriber arrives at — Broadcast doesn’t support per-record redirects on API-driven flows.
I customized only the success state. What happens when a subscriber clicks an expired link?
The expired-state copy falls back to Broadcast’s English default. To customize it too, switch the state selector to Link expired and fill in the heading and body for that state.
Where does the manual {{ confirmation_url }} flow get its page text from?
It inherits from whichever flow created the pending SubscriberConfirmation for that subscriber. If you used the Subscribers API to create the subscriber and then sent a follow-up transactional with {{ confirmation_url }}, the page uses the template that the API stored on the confirmation. If no template is attached, it falls back to the channel default and then to English defaults.
API Reference
Everything you can configure for confirmation pages in the admin UI can also be managed through the API:
- Per-state page text — the Templates API accepts
confirmation_page_settings, a nested object keyed by state (confirmed,already_confirmed,expired,not_found,confirmation_failed,fallback), each with aheadingandbody. The same object is returned in template responses. - Default confirmation template — set
default_confirmation: trueon a template via the Templates API to make it the channel default. - Template assignment on opt-in forms — the Opt-In Forms API accepts
confirmation_email_template_idto point a form at a specific confirmation template. - Redirect URL — settable via the Opt-In Forms API under
automation_settings.confirmation_redirect_url.